|
|
|

In the event that data has been lost and must be restored from a backup, the program offers two options:
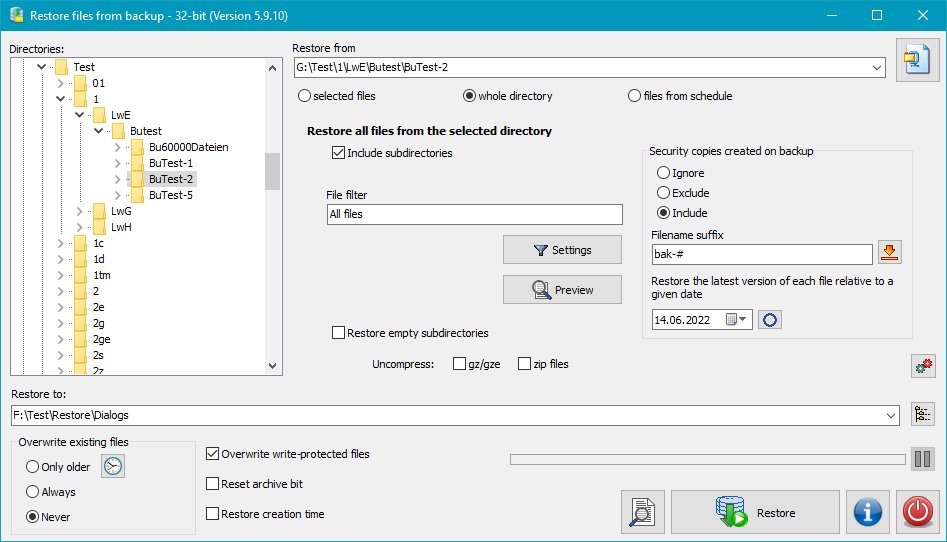
Clicking the button in the tool bar on the left will open a dialog window in which you can select which files and from which directory you wish to restore and to which directory the files are to be copied. These settings can be saved as task (<filename>.rsj) for use at any time.

When restoring files, you must consider how the data was backed up (see Backup destination):
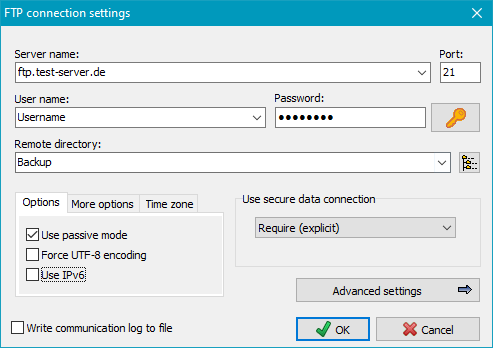
Files can be restored either to the original source directory or to any other location:
If the backup was made into single compressed files, select the same mode as
used during backup. So all files will automatically be unpacked on restore
in the right way (default setting : gz/gze).
Personal Backup adds the file
extension enc for uncompressed encrypted files. These files are
decrypted automatically on restore. If there are files from another application
using this extension, the decryption will fail. You can prevent the program
from decrypting such files by checking this option.
If this option is selected, even empty directories will be restored.
If this option is selected, the archive bit of each restored file will be reset.
If this option is enabled, all files in the destination directory that match
the specified filter conditions (see below) and that are not existing in the backup
directory will be deleted after restore. Thereby it does not matter whether the files
were encrypted and/or compressed during the backup.
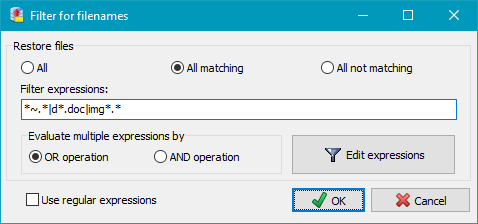
By using filename filters, filenames matching certain
patterns may be included or excluded. Use the same rules as
described for backup file filters
(Standard file filter
or Regular expressions).
You can specify whether you want to restore only files newer or older than a given fixed or relative date.
Here you can specify whether existing files are always to
be overwritten, or only when they are older than those from
your backup, or never.
Comparing the timestamps of files is problematic when using different file
systems. Adjust the settings
to be system-independent (see here).
Creation time
If this option is selected, the creation time
of the files will also be restored.
Alternate data streams
If this option is checked, any alternate data streams saved with the
files (see here), will be restored.
Document summaries
If this option is checked, the document summaries, possibly saved with the
files (see here), will be restored.
File permissions
In NTFS file systems and network shares, an access control list (ACL) that specifies
the permissions for each user is associated with each file and directory.
If this option is set, also the permissions of files and directories will
be restored (see here). For this to happen, it
is necessary that ACLs are supported by both source and destination.
Junctions
If this option is set, the information about junctions saved during backup
(see here) will be analyzed to
recreate the junctions in the destination directory of the restore.
Depending on the restore settings, the contents of the directories, to which
the junctions point, must possibly be restored separately.
Important note: To restore junctions, administrator rights
are required.
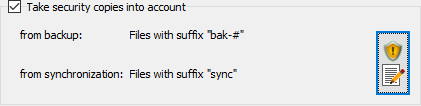
This option is disabled by default, but must be activated only if
Security copies
were created during backup.
Use this option to define how these security copies shall be taken into account
during restore. The settings for prefixes and suffixes must be set in the dialog
(see screenshot below) as used during backup to identify these directories
and files. There are two possible selections:
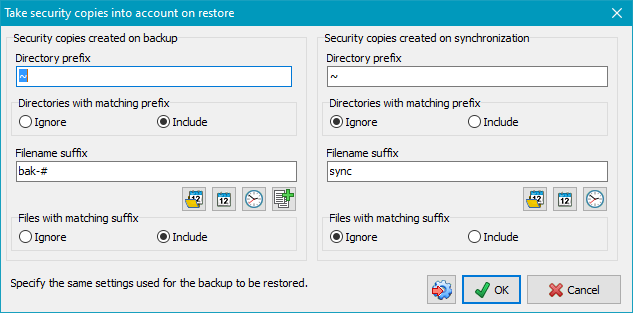
To facilitate this setting, you can click the very left button at the bottom to import the settings from the corresponding backup task. The settings can be specified separately for security copies from backup and from synchronization:
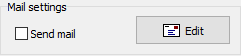
Similar to the option for backups, a mail with status
information and optionally a log file can be sent after
performing a restore task. The settings
are the same as for backup.
Here you can optionally specify a fixed password to be used for decryption of files.
In this case the user will not be prompted to enter it during restore. So
a restore may be performed in background without user interaction.
By clicking the small button at the right, you can import the password from
the associated backup task. Note that this option
cannot be used if the backup task is protected.
The icon on the button changes to show whether a fixed password
![]() was specified or
the password has to be queried
was specified or
the password has to be queried ![]() on restore.
on restore.
Clicking the ![]() button will open a dialog to adjust
the log settings for restore.
button will open a dialog to adjust
the log settings for restore.
Click then ![]() button to view the current log.
button to view the current log.
Clicking the ![]() or
or ![]() button will save a configured restore task with all settings to disk.
To load and reuse such a saved task, click the
button will save a configured restore task with all settings to disk.
To load and reuse such a saved task, click the
![]() button.
button.
A saved restore task can also be started from the command
line. This makes it possible to use the Windows Task
Scheduler to restore files at specific times, or to restore
a directory (for example automatically on logon) by adding
a shortcut to the Windows start menu (see All Programs ⇒ Startup):
PersBackup /restore <rest-task>
You can configure a Windows scheduled task to carry out an automatic Restore
by clicking the ![]() button. The configuration procedure is the same as described for backups.
button. The configuration procedure is the same as described for backups.
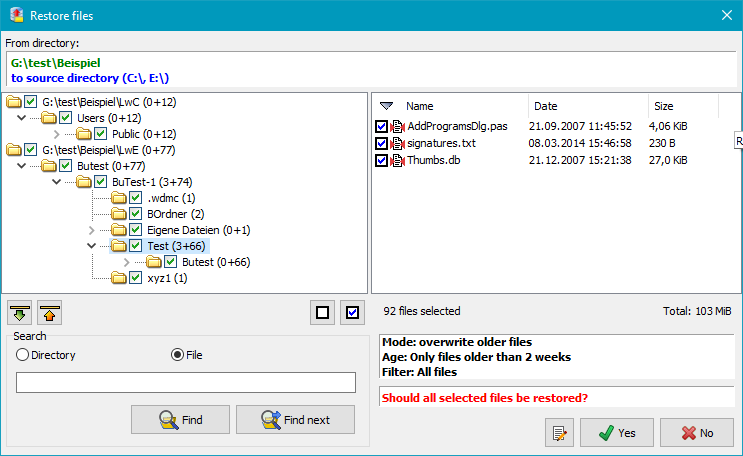
Clicking the button will start the restore. Before restoring any files, the program will create and display a list of all files that match the filter conditions. If the selection is not to your liking, you can cancel the restore at this point and adjust your settings. It is also possible to select or deselect files or directories individually by tagging the checkboxes.
Right-clicking a file will open a local menu that allows its contents to be viewed or compared with the source (if available):
To use these options, an external viewer and a comparison program must be specified.
Clicking the ![]() button
will open an appropriate dialog.
button
will open an appropriate dialog.
After this, all selected files will be restored. Any necessary unpacking and decryption will occur automatically. If required, a password must be entered by the user only once. If you wish, you can save the password with the restore task (more ..) to avoid any interaction during restore
The program can be started via the Windows Start Menu or in Personal Backup by selecting Control panel menu - Utilities - External Restore program in two different modes of operation:.
You can copy this supplementary program onto a USB stick to restore files in emergency without installing Personal Backup in its entirety.
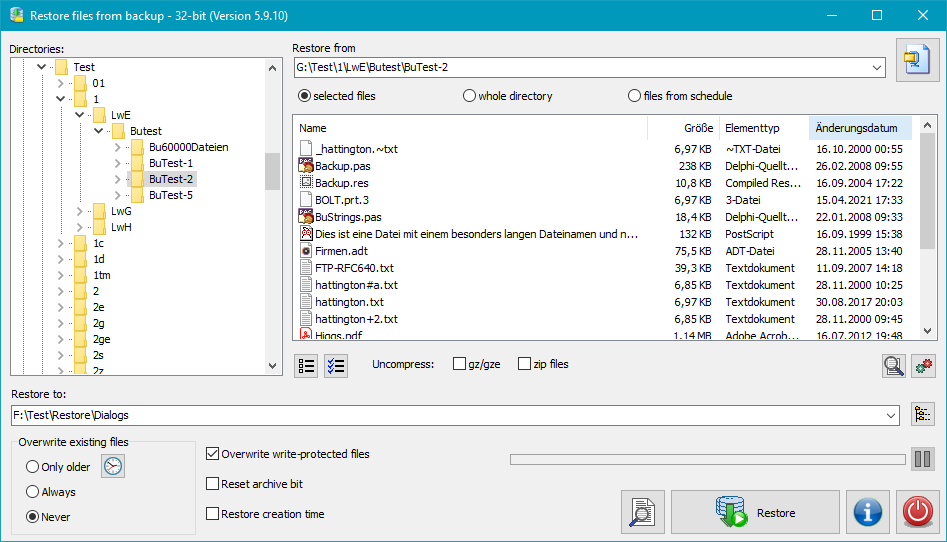
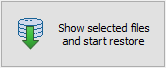
The program offers three options to restore data backed up into separate files (even if compressed as gz/gze or zip and/or encrypted:
In all three cases compressed and/or encrypted files will be unpacked and/or
decrypted automatically. The destination directory must be selected manually.
In addition you can select, whether files already existing in the destination
directory shall be overwritten or not. If only older files shall be overwritten,
you can adjust the settings for time comparison
(see here).
Optionally you can disable the overwriting of write-protected files and reset the
archive bit of each restored file.
By clicking the tool button at the lower right of the file list
you can adjust whether you
wish to associate gz, gze and enc files with PbRestore as
the default application in Windows. Click the upper right button to switch to
zip mode.
First, on the left select the directory or if the option Uncompress: zip files
is selected the zip archive, containing the files to be restored.
On the file list at right you can select the desired file(s) using the mouse
or keyboard (Ctrl-A for all or Ctrl-N for none) in the normal way.
Clicking the Restore button will initiate the copying of files into
the specified destination.
Uncompress: If the option Uncompress: gz/gze files is selected, the
files will be unpacked automatically. The same applies to zip files if the
option Uncompress: zip files is enabled.
Decryption: The program will automatically recognize if the files to be restored
are encrypted (enc, gze or zip). In that case the user will
be prompted to specify the password used on backup to decrypt the files during restore.
Double-clicking a file or the Preview button at the lower right will
start the application associated in Windows with this file (e.g. an image viewer for
jpg file).
First, on the left select the directory or zip archive, containing the files to be restored.
After clicking the Restore button all files from this directory and
optionally all its subdirectories or all files from the selected zip archive
will be copied to the destination directory. Using a filter, the selection can be
restricted to particular files.
The directory structure will be retained. Unpacking and/or decryption is done
as described above.
In addition, existing previous versions created with the
Leave in original directory option can be taken into account:
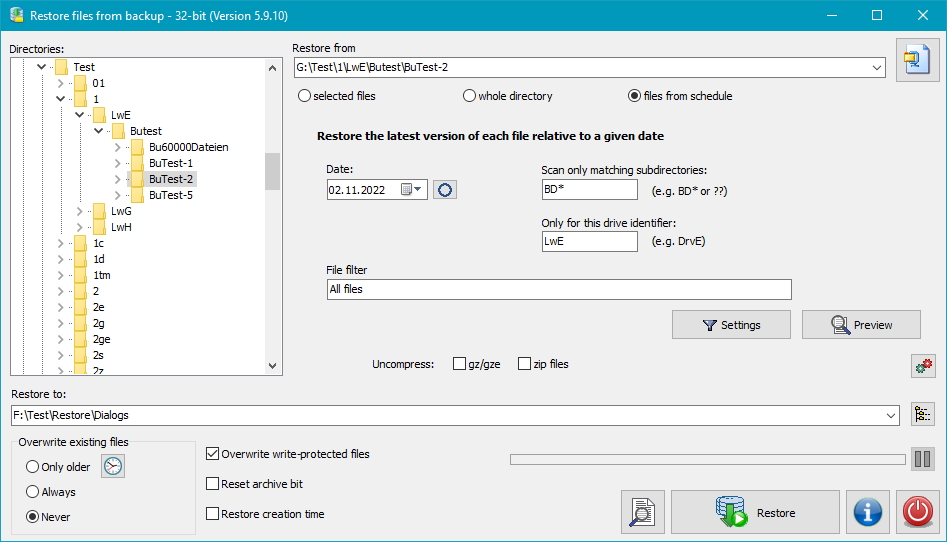
If your files were saved using an alternating schedule
(Full backup in conjunction with incremental/differential backups) the files will be
distributed to several directories (e.g. BD01F, BD02I, BD03I,..).
When restoring it is necessary to retrieve the most recent versions.
The user must specify the following items:
Unpacking and/or decryption is done as described above.
Clicking the Preview button allows you to check in advance whether
the selection of files has been set correctly.

If the backup was placed into one zip archive
or into zip archives per subdirectory, the files can be unpacked using any
popular file archiver such as WinZip or 7zip. This applies even to
archives with encrypted data.
But if, in addition, also the filenames were encrypted (available since version 5.9.4),
a full recovery of backed-up data is no longer possible using one of these programs
(see here). The file data itself will be decrypted
correctly, but the filenames cannot be recovered. In this case the use of PbRestore
is required. The program will decrypt all directory names and filenames
on reading the zip archive and will rebuild the original directory structure.
Depending on the settings during backup, the following options are available:
Initially, all files are selected. By clicking the checkboxes to the left of the directories
and filenames, they can be alternatively excluded or included. Using one of the two buttons
above the file list, all files can be deselected or selected.
In addition you can select whether files already existing in the destination
directory shall be overwritten or not. If only older files shall be overwritten,
you can adjust the settings for time comparison (see here).
Optionally you can disable the overwriting of write-protected files and reset the
archive bit of each restored file.
After selecting a destination directory, start the restore by clicking the
associated button.
Click the button to the upper right of the file list to switch to
single file mode.
To control the operation mode of PbRestore, use the following command line options: